

TL;DR Configure Thunderbird with Dovecot and a Self-Signed Certificate on Guix
This will work on both Guix and PantherX.
System Config
It’s easy to run a local dovecot server:
Add this to the service section of your system config (/etc/system.scm):
(dovecot-service #:config
                 (dovecot-configuration
                  (mail-location "maildir:~/.mail")))
Reconfigure with:
guix system reconfigure /etc/system.scm
Make sure to include ~/.mail in your backup.
Authentication
Defaults to PAM authentication, so you can simply login with your linux account username and password.
Thunderbird
Add a new account with the following settings:
- Username: your linux username
- Password: your linux password
Select advanced settings
- Server Name:
localhost - Port
993 - Connection security:
SSL/TLS - Authentication method:
Normal password
Now open the config editor: Settings -> Search for “Config” and “Config Editor …”
- Search for
network.security.ports.banned.override - Select
string - Edit and add
993 - Restart Thunderbird
Now go to Settings -> Privacy & Security -> Certificates -> Manage Certificates -> Servers.
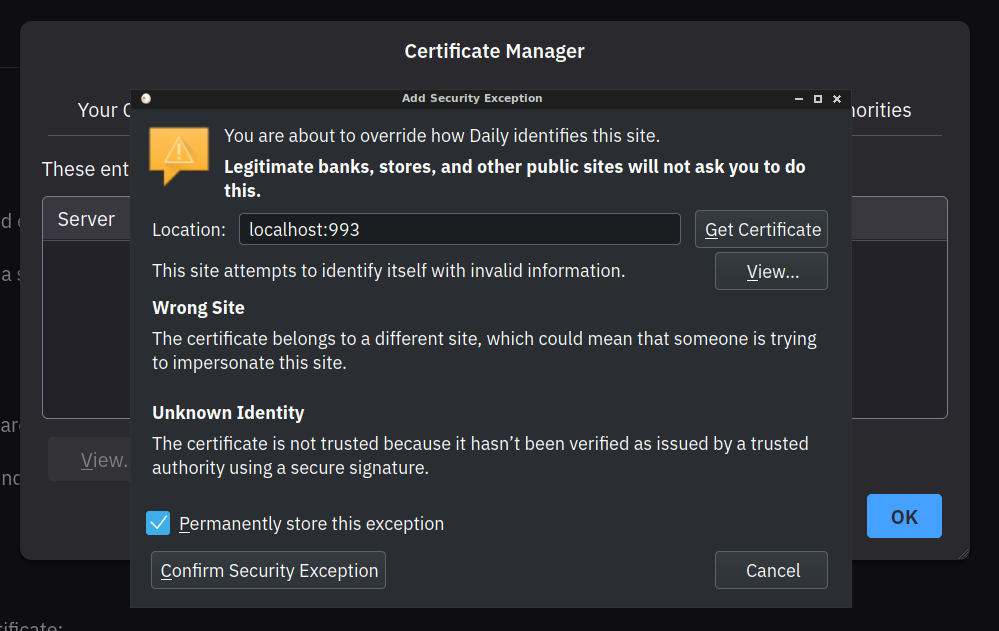
Add a new exception for localhost:993. Confirm.
At this point, you should be able to access the dovecot server on localhost with a self-signed certificate.
Troubleshooting
Consult the logs:
tail -f /var/log/maillog
Try with mutt, a command line client:
mutt -f imaps://<your_username>@localhost