

TL;DR Fast setup guide for deploying Jekyll sites automatically to AWS S3 and CloudFront using GitLab CI/CD pipelines.
Instructions
This guide assumes that you have configured GitLab and GitLab Runner with docker and are already using gulp to build you assets, and the s3_website gem for deployment to S3 / CloudFront.

This GitLab CI automation will do the following:
bundle installyarngulpjekyll builds3_website push
If you workflow differs, adjust the .gitlab-ci.yml config example below.
Set-up
1) Add and secure environment values
Open your repository and go to settings/ci_cd > Variables
AWS_ACCESS_KEY_ID, add your ID, select protectedAWS_SECRET_ACCESS_KEY, add your Key, select protected
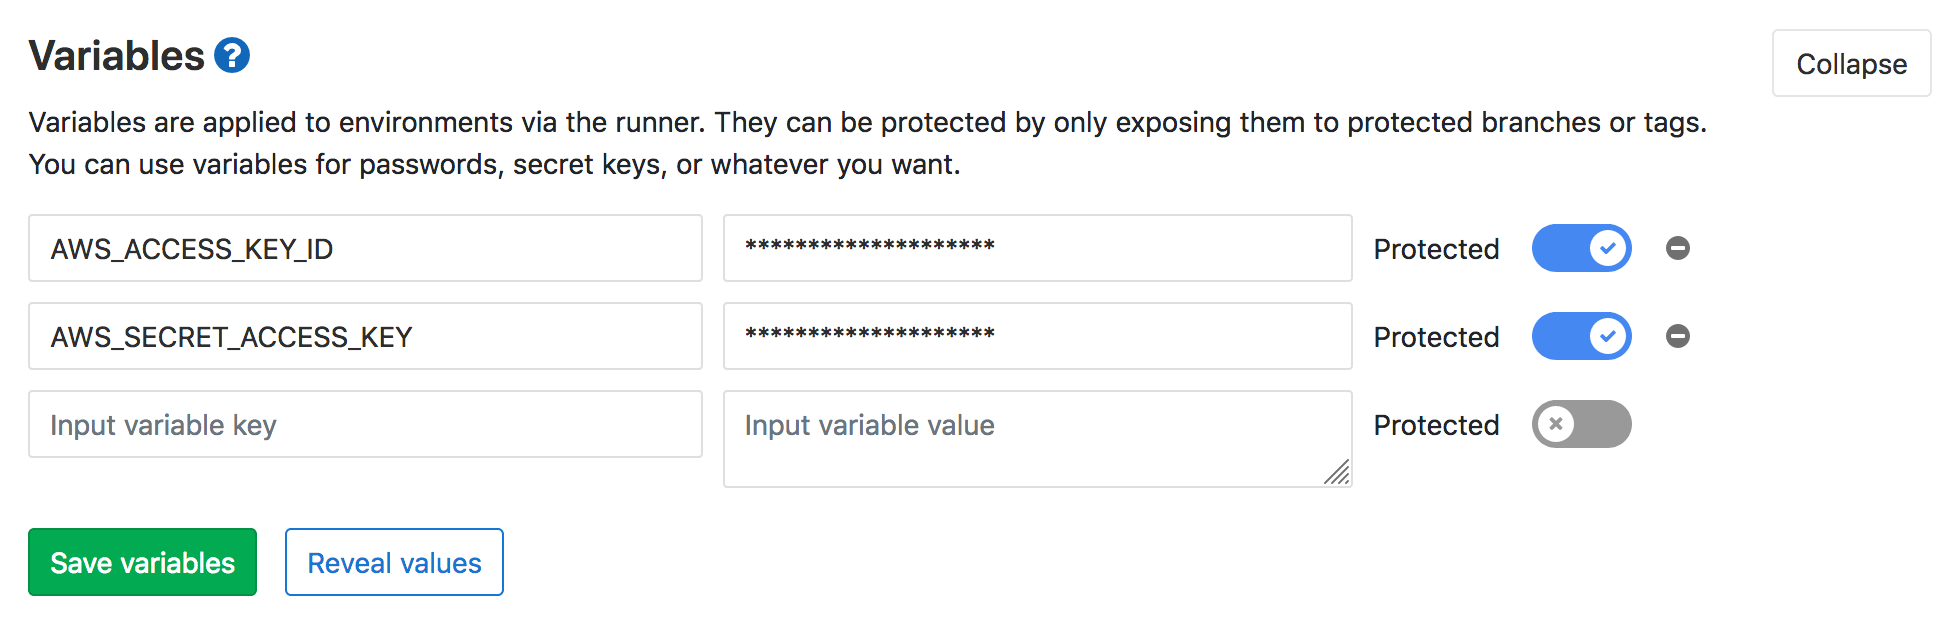
… and hide the variables.
Note: Protected environmental variables are only available during build processes on protected branches. This is especially important for public projects, with multiple contributors. The environmental values set are visible to any member with access level Maintainer and above. I’d suggest to limit AWS access to the GitLab IP.
Next go to settings/ci_cd > General pipelines and uncheck Public pipelines. After that, check under /settings/repository > Protected Branches and ensure that your master branch is protected.
2) Prepare your repo
1) Ensure s3_website.yml uses the environmental values, update BUCKETNAME and make sure it looks for the site under public/.
s3_id: <%= ENV['AWS_ACCESS_KEY_ID'] %>
s3_secret: <%= ENV['AWS_SECRET_ACCESS_KEY'] %>
s3_bucket: BUCKETNAME

site: public/
2) Update _config.yml to ignore the vendor folder - amongst others.
exclude:
  - .gitignore
  - Gemfile
  - Gemfile.lock
  - yarn.lock
  - package.json
  - node_modules
  - vendor
  - s3_website.yml
  - .gitlab-ci.yml
  - gulpfile.js
  - src
  - README.md
3) Add configuration
Create the .gitlab-ci.yml and add the following values.
image: franzos/ruby-node-gulp-java

cache:
  paths:
    - vendor/

before_script:
  - bundle install --path vendor

stages:
  - build
  - deploy

build:
  stage: build
  script:
    - yarn
    - gulp
    - JEKYLL_ENV=production bundle exec jekyll build -d public/
  artifacts:
    when: on_success
    paths:
      - public
    expire_in: 1h

deploy:
  stage: deploy
  script:
    - export AWS_ACCESS_KEY_ID="$(echo "$AWS_ACCESS_KEY_ID")"
    - export AWS_SECRET_ACCESS_KEY="$(echo "$AWS_SECRET_ACCESS_KEY")"
    - bundle exec s3_website push
  only:
    - master
The docker image already includes node, gulp and java for a speedy build and deployment process. With the runner on a 1GB DigitalOcean server, the whole process takes between 1.30 - 3 minutes.
A note on Artifacts
Artifacts are used to store the build result and make them available for download trough the GitLab UI. However, most projects will find them unnecessary. Unfortunately we still require them, to make the results of build available to the deploy stage. However, with the expiry time set to expire_in: 1h, these artifacts won’t clutter up your hard disk.
What’s next? (Future Posts)
- Deploy Jekyll to AWS S3 & CloudFront
- Secure your site with CloudFront SSL or LetsEncrypt
- Set-up GitLab on Debian
- Configure GitLab Runner to work with GitLab
- Quick n’ Dirty: Jekyll via Gitlab CI to S3 & CloudFront